Tominach Pasta

I made up the name by combining tomato with spinach, so that is how it is pronounced. It was a sneaky way of getting one child to eat spinach without whining. (And we all need less whining and more eating)This is another dish I lovingly refer to as a Dump Recipe. That means I really do not measure a single ingredient, I just dump it all into the pan. I learned ovenr 20 years ago how easy it was to make a homemade version of Hamburger Helper and have used that technique here. That makes it an easy dish for a busy night’s dinner.


INGREDIENTS

1 pound ground Italian sausage

1 pound pasta

1/2 cup dried spinach dip mix

1 small onion sliced

2 cans diced tomatoes

water

favorite herbs

4 ounces Feta Cheese (more if you like!)


Begin by cooking the sausage and onions thoroughly. Drain off any grease. Add the pasta and tomatoes. Fill the cans with water and pour on top. Mix in the dry spinach dip. I buy it in bulk from Azure standard so it has other vegetables already mixed in.

image

Now the herbs will depend on what you like, if you used tomatoes with other ingredients and even what was in the spinach dip. This time I used basil, garlic, salt and pepper. You can also use parsley, oregano, Italian seasoning and even pepper flakes.


Cover and cook over medium heat till pasta is tender. I check occasionally  to stir and make sure it does not need more water. When it s ready add the feta cheese, stir and serve.

image

Enjoy!

Cube Steak with Gravy

Cube steak (or minute steak) is partly a cut of beef but is also identified by how it has been tenderized. It begins as Top Round or Top Sirloin, both of which are rather tough cuts of steak. It is tenderized by pounding the bejeebers our of it with metal prongs. You can buy cube steak at the market or purchase the aforementioned cuts of beef and tenderize it at home. Some will use a maillot but I personally don’t think it does the job right. A blade tenderizer is a single use device but definitely worth buying if you want to make your own cube steak at home.

Just one of several versions available to purchase

INGREDIENTS

2-4 pieces if Cube Steak

1 Medium onion

1 can Cream of Mushroom Soup

Milk

Salt

Black Pepper

2 tsp Garlic Powder

Oil

While your frying pan is heating, season your steak. This is one time I feel the meat really, really needs salt. Also season with black pepper. Sauté the onions until soft and lightly brown. Add the steaks and brown on both sides. Push everything to the side and add the soup. Fill the soup can with milk and combine in the pan to deglaze and form a gravy. Add the garlic powder. Spread the steaks even in the pan and bring to a simmer. Cover with a lid and cook for 30 minutes.

image

i prefer to make this dish in my electric skillet as it cooks evenly and I don’t have to keep coming back to stir. Depending on your pan and burner, check occasionally to make sure the gravy isn’t sticking. Check the steak to ensure it is as tender as you prefer. The thicker the cube steak, the longer this will take.

if you really like mushrooms, sauté some with the onions.

image

My family loves this best with mashed potatoes. Tonight I served with home canned carrots for a little color. A tough bit of steak is so tender I can cut it with a fork.

image

Italian Green Beens home canned

There are certain vegetables I think taste better canned than frozen, and green beans is one of them. There are so many ways to add flavor in the canning process that making small batches works perfectly. There are two ways to can green beans, raw or hot pack. Raw pack means the beans go into the jar raw and are then processed. Hot pack has you boiling the beans for 5 minutes and then packing into the jar. Hot packed beans allow you to get slightly more in the jar and since they are already cooked you won’t increase your head space. The batch of beans I made over the weekend was done raw pack, but when I do more this coming weekend I will do them hot packed so you can see th difference.

Ingredients for quart jars
Green Beans
1 tsp Canning Salt
2 Garlic Cloves
1/4 tsp Black Pepper
1/4 tsp Italian Seasoning
1/4 c Sliced Onions
Hot Water

Canning beans requires that they be as fresh as possible. While there are many foods that can sit around for a while, beans go limp quickly. I really prefer to can them within 48 hours of being picked.to preprint the beans, give the kids a bag and a bowl. Yes,this is a project I make them do because it is easy and they can do it while watching NCiS on Netflix. Snap off both ends of the bean, just the very tips. Sometimes the sting down the middle will start to peel off and I just finish the task, but don’t work about it if it doesn’t start when strapping the ends.

image

Canning salt is always used because it doesn’t have the additives that your Mortins salt will have. These can add flavors you don’t like and will cause the water to become cloudy. Keep I mind that salt is not required, but the amount is significantly less than you will find in store-bought canned beans. It is added because when cooking with salt, it amplifies the flavor of the foods being cooked.

This is for quart sized jars, but can easily be adjusted for pints. I like quarts because while we won’t eat a whole jar in one meal, the leftovers will be eaten a few days later. So why not do pints? I can can twice as much intense same time and use half as many jars to store.

While you can place the garlic cloves whole, I prefer to smoosh them a little first. This releases the oils and infusing the beans with more flavor.

In each jar place all the ingredients and top with green beans. Or, you can put the onions on top as I did in a few jars, you just need to save room. Everything will get mixed as they work in the pressure canner. Heck, half it it gets mixed up as you work out the air.

image

Be sure to remove all air bubbles. This is much harder with raw means than ones that have been cooked. You literally have to jam your utensil down to find air pockets. If you don’t remove all the air when you are done processing you could be stuck with jars that only have liquid covering half your beans. Leave one inch of head space, wipe the rims and place in the pressure canner. Process pints 20 minutes and quarts for 25.

image

To figure out how many beans you should out up, think of a pint as one can of beans from the store. Approximately 10 pounds of green beans will make 5 quarts. When opening the jar make sure the lid is still indented and fully sealed. Be sure to bring the beans to a boil before eating and enjoy!

Cherry Lemonade

Gee whiz, it must be cherry season, right? I know, another cherry recipe, but I may as well share it now so you can use it, right? If you have made the Strawberry Lemonade this is very similar.

INGREDIENTS

8 cups Cherry Juice

4 cups Sugar

8 Cups Lemon Juice

While you can buy the cherry juice, I got it from fresh cherries using my juice steamer. You can also use an electric juice but you need to remove the pits first. My steamer lets me to throw it all in at once.

image

Mix all ingredients in a pot and bring to a simmer. Continue to cook until all the sugar has dissolved. Pour into jars leaving 1/4 inch head space and process in a water bath for 15 minutes.

image

To mix, add 1 quart if concentrate to 1.5 quarts if water, I know this is more than the strawberry lemonade and we even used less sugar, but the cherries are sweeter, hence the change,

See, easy peasy! You can freeze the concentrate as well if that works better for you. Just leave two inches for expansion in Your jars. Now enjoy a taste of Summer all year long.

image

Use a Steam Juicer to make Cherry Juice

It is that time of year when certain fruits are producing. You gotta act fast because you have a short window before they are rotting on the trees. Cherries fall into that category and I have been putting things up left and right. This year I was gifted a steam juicer and an I just say I am in LOVE. It is the gosh durn easiest way to get juice and is FAB-U-LOUS!

A steam juicer comes in three parts. The bottom holds the water, the middle holds the juice and the top is for fruit. The coolest part is that you do very little prep work to the fruit before placing in the steamer. For cherries this means no pitting! Wash the fruit and place in a pot of water. This allows you to check for any fruit that floats,which should be tossed as it may have a worm. Next place into the strainer. That is it, I promise. Fill that sucker up full and get ready to cook it down into a pulp.

image

Place the strainer into the middle piece which collects the juice. The middle piece will have  a tube attached, this is how the juice is drained. Be sure that it is clamped shut or you will have juice leakage. The bottom piece sets directly onto the burner and is filled with hot water. Place the other two pieces on top and crank the heat up to high.

image

As the fruit cooks, occasionally stir it but do not press down. Pressing will push it into the juice and you will need to strain it later. If cooking a look of fruit be sure to occasionally check the water level. New fruit can be added on top and just mixed in with the pulp. I made 3 gallons of cherry juice this day and this was all that was left of what I had put in the pot.

image

If some pulp does slip through use a pear towel to wipe away before draining out the tube. The juice can be drained into a plastic jug for freezing, a pitcher for easier handling or straight into jars ready to waterbath.

image

There are many things to do with your cherry juice. You can mix up cherry lemonade concentrate, cherry jelly or reduce it to make Gremadine. This batch I just bottled the juice straight so I can add it to pitchers of juice over the year for custom blended flavor. If you don’t can, it freezes well. A friend goes through a lot of distilled water as three family members uses c-pap machines so it get clean jugs from her I use for freezing juices. Those I freeze ready to drink.

How cool is that? So much easier than an electric juice and it produces clear juice without pulp. I hope you give it a try.

2 Ingredient Cherry Extract

When baking people look at several factors before starting, what is the cost, do I have all the ingredients handy and how healthy is it. Extracts today fall into 3 categories. They can be completely composed of artificial ingredients, made with real ingredients but other things have been added or 100% pure extract. The last group is the most expensive but tastes the best. What if you could make your own at a fraction of the cost? The process is the same whatever flavor you want to make, but this time I am making cherry.

This tiny bottle costs almost $12!

INGREDIENTS

Vodka 750ml

Cherries 1 cup

I purchase the cheapest vodka I can find, I don’t think it  makes a huge difference to buy the pricier brands. I will add that I don’t drink so if you know a particular brand is significantly better, use it by all means.

Allow cherries to set in water and toss any that float as they ,ya have worms.

In this case I am only making up a single jar, but if I were to make some for Christmas gifts I would do several. Pit cherries and cut in half and place 1 cup into a quart sized Mason jar. Cover with vodka until full and place on the lid and ring. Get it good and tight because you don’t want I to leak.

This sized bottle makes a perfect quart of extract.

Do not toss the vodka bottle! Once the extract is ready it will be strained and out back into it. This makes using it significantly easier than taking it out of a quart jar. If however you intend to give it as gifts, small bottles can be purchased online.

Place the mason jar into a brown paper bag and leave it in a cool and dark place. Ever few weeks give it a good shake. Allow the cherries to flavor the alcohol for at least 3 months. The longer you leave it, the stronger the flavor will be. Use as you would any cherry extract purchased from the store.

So many recipes so little time.

Stay tuned for other extracts you can make at home.

Strawberry Lemonade

There are certain foods that I always associate with Summer. While we had a row of strawberries in the garden, I loved going to u-pick farms and eating as I worked.

image

As a kid the Country Time Lemonade commercials got my attention but the powdered mix just never held a candle to the real thing. A cold glass of lemonade on a hot day just hits the spot.

image

You can understand how mixing the two is just natural for me. I canned the concentrate but it can also be frozen or used immediately.

INGREDIENTS

6 cups Strawberries

4 cups Lemon Juice

5 cups Sugar

Rinse and hull the berries and remove any bruised parts. Purée the berries to desired consistency. The more you purée it the more it blends with the juice, but some people may like to leave a few chunks.

image

Place the berries and sugar in a pot with the lemon juice. While you can certainly use fresh squeezed, bottled works as well.

image

Heat the mix until it reaches 190 degrees. If it boils you will have a foamy mess all over the stove. Ask me how I know?

The original recipe from Ball calls for 6 cups of sugar but we found that to be too sweet for our tastes. Another option is to use raspberries instead of strawberries.

CANNING

i used quarts but pints work as well. Fill to 1/4 inch headspace and process in a water bath for 15 minutes.

When freezing be sure to allow 2 Inches of headspace.

If making for immediate use, it can be made the day before.

image

MIXING

To use the concentrate mix it 50/50 with cold water. If you want punch I suggest adjusting it to 25% water and 25% Sprite. You can also top with strawberry ice cream to make it really fun.

image

Have a cool Summer!

Better Chicken Breasts

There are so many great recipes out there for chicken breasts but they often omit one important detail, the quality of the meat that you can buy. Go to any grocery store and most of the chicken has been plumped up with a salt and water solution. Each package will tell you how much has been added and some brands it is quite significant. This is an issue for two reasons. First, you end up paying $3+ a pound for salt water instead of meat. Second, the meat shrinks down so much that you end up with less than you need for dinner.

So what is the solution? Read labels and know which chicken has been plumped. Alternatively there is a company called Zaycon that doesn’t plump it’s chicken, has fabulous prices and is purchased in bulk. Each box has 40 pounds of fresh chicken that you get to divide and either freeze or can in the proportions that work for your family.

The heavy duty box has a sealed bag inside which hold smaller bags of chicken pieces.

Zaycon sells more than just chicken, you can find ground beef, ham and even smoked salmon. Once you have signed up to receive emails you will be alerted to events in your specified area. There is never an obligation to buy. If the increments are too large for your family then find a friend to split the case with. To pick up your order you meet at the designated place and the Zaycon driver places your order in the car for you. All you need to do is go home and divide up into family sized portions. I typically get about 30 meals from each case.

image

I love knowing my freezer is full of good quality chicken for the summer months of grilling. Next up is the ground beef sale and currently the price is $3.99 a pound which for me is a good price. Meanwhile I will be receiving my chicken order in just a couple of weeks. I cut up pieces for stir frying, leave some pieces whole and have a few bags marinating for quick meals. I have friends who prefer to an most of it to save on freezer space. Whichever way works for you, give it a try and let me know what you think!

3 Rules for Better Rose Bushes

Many years ago we moved into a house that had two rose bushes. I avoided them for a long time because I had always heard how difficult roses were to keep. Also that they were easily damaged. One day I found a magazine article that changed how I viewed roses. Their care was explained so simply that I couldn’t understand  how they had ever gotten such a bad rap. Now I have 6 bushes to care for and it really isn’t that big of a deal.

To start with, roses need a very specific nutrient called potassium. Now you can go to Wal Mart and pick up a bag that is in powdered form and it works fine. Or, you can use something you already have and were just going to throw in the garbage, banana peels. Yup, bananas and their peels are just full of potassium. All you need to do is cut up the peels and bury them next to the rose-bush. Not only will they provide the needed potassium, they will rot and create a compost for the soil.

Pruning is where most people worry the won’t do it correctly. There are a couple terms that make it simple to remember. Deadheading is only cutting away the spent blossoms. Doing this allows the plant to continue blooming the entire season. In other words, a few minutes of your time will mean more and bigger blossoms to enjoy. Pruning is selectively cutting a plant. This includes deadheading as well as the proper shaping of the  plant as well as cutting away dead wood.

image

There are several things wrong with the plant pictured above and it will greatly benefit from a good pruning. When you are pruning for the first time I suggest taking it slow. Cut some away then come back and cut some more. This prevents you from cutting away too much. The more you prune the better you become at knowing exactly where to cut.

Begin by cutting away all dead wood. These are all the brown branches. This is normal and happens every year as some branches just don’t make it through the winter. Be sure to cut the entire branch off that is dead, don’t leave little stumps behind. Always make cuts at a 45 degree angle with the cut facing out. This may seem trivial but the direction of that cut will determine the direction the plant continues to grow. If you cut facing the center of the plant you will regret it later on. Once the dead wood is gone you can decide which branches are growing the wrong direction. One thing you don’t want are branches who cross each other forming an X. This will give your rose plant a better shape and makes future pruning significantly easier. One thing to remember is that the fewer buds a plant has the more energy is can put towards the ones it does have. This translates into bigger blooms. If you would rather have a lot of small buds then be a little less aggressive in your pruning.

There is a significant difference from where this plant started.

As the season progresses it is time to deadhead spent blossoms. I believe this is best done on a daily basis. Doing it daily only takes a couple of minutes and ensures that you will always have new buds forming. This is ideally in a perfect world and life doesn’t always cooperate that way. So at a minimum it should be done once a week. Let it go too long and you will find time when you have absolutely nothing in bloom.

What to look for are leaflets with specific number of leaves on them, that is where the cuts will be made. Early in the season you cut right above a 3 leaf stem, by mid Summer it should have 4 leaves and by the end if your season look for 5 leaves. This picture is a great visual.

image

It quickly becomes habit and you don’t even need to think about it anymore, you just do it.

The petals are long gone and it is time to prune.

Keep a bucket or garbage can next to you as you prune so all th cuttings can go directly into it.

Perfect cut
Perfect cut

Each cut requires only a few seconds to make. I keep a basket by my front door with my pruners, gloves, shears and something to kneel on. This allows me to do gardening quickly and without having to search the garage for items all the time.

I wish I had thicker gloves but my hands are so small I cannot find any that fit. But these are better than nothing!

Sometimes I find unwelcome visitors living on my roses. While I want lady bugs, aphids are not welcome. One easily made solution gets rid of most pests. In a spray bottle mix warm water with 2 Tablespoons of Dawn dish soap. Dawn is used on animals during oil spills to clean them up so I figure is it perfectly safe to use on my roses compared to other brands. Using the mist setting, spray your plants not only on the blooms, but the top and especially bottom of the leaves. Sometimes you may have to purchase something from the store but always try this first. Not only is it cheap but very successful.

There you have it, 3 rules for successfully growing roses. Provide them with potassium, do regular pruning and use dish soap spray for pests. I hope this makes growing roses a little less daunting and please share how your roses are doing this year.

Toner versus Astringent, is there a difference?

Today I held a skin care class for about 20 teenage girls and it was loads of fun. They learned a lot about basic skin care, such as washing their face every day. When I said removing their makeup before bed was important to keep thir skin looking healthy a couple were heard to say “even if you just wear mascara?” The answer was absolutely because wearing it all the time can lead to lashes breaking. Eventually we discussed the purpose of astringents and I was asked how they were different from toners. What a great question!

Listening to ads on tv can be confusing as various names are thrown around to describe the product being sold. Balancers, clarifying lotions, clarifiers, skin purifiers, toners and astringents are all the same thing. While some distinguish one from another based on the level of alcohol, most companies are working to reduce or eliminate that ingredient while keeping their effectiveness. Most experts classify astringents as being the strongest in this group.

So why use a toner at all? It has four main purposes. Remove residual traces of cleanser, remove the last amount of makeup left after a cleanser is used, remove excess oil and reduce the size of pores. Let’s start with the cleanser and makeup issue. Years ago when makeup removers were not as developed there often was some makeup left behind. Today, a good makeup remover no longer has that issue as it will remove every bit of makeup. A good cleanser rinses away completely.

image

Only those with extremely oily skin need to worry about that issue and toner is a great help. If you are prone to breakouts it might be beneficial to use a toner. I prefer to use a toner at night so it has a chance to work on the skin without fighting other products like your sunscreen and makeup.

The last reason is to reduce the size of pores. This is a controversial reason because some feel toners don’t really do that at all. I believe that it depends on the toner. I have seen the results on friends whose skin looks radically different after just one month.

When trying a toner, alcohol is the enemy. It’s sole purpose is to dry the skin. Remove too much oil and the body’s natural reaction is produce even more. If your skin feels tight after using a toner, it has dried out the skin requiring you to use even more moisturizer. A good toner will leave the face feeling soft, smooth and fresh.

To remove excessive oil or makeup, spray a cotton ball with the toner and gently rub your face. You will see the dirt and oil on the cotton. Continue until no more is coming off. To reduce the size of your pores, spritz a light mist in the face and allow to dry naturally.

I don’t have excessively oily skin, but as I hit my 40s I found my pores were getting larger. I tried a cleanser designed to reduce them and saw no results. As I began using rosewater as a toner a couple times a week I saw the difference it made. Now I am sure that my pores were not changed enough that anyone else could tell because they were just beginning to get larger, but looking at my face close up in the mirror I sure could.i also noticed a difference in how my foundation looked.

image

A good toner requires a humectant. This will increase the ability of the toner to penetrate the skin. It also draws moisture from the air and into the skin. These effects lead to softer and hydrated skin. How awesome is that?

Now I am the queen of cheap, I have mentioned this in my blog a few times. If something has multiple purposes then I am sold. At first it was hard to rationalize a bottle of toner taking up space in my bathroom. Over time I could not believe the uses for this one little bottle of rosewater. Rose oil has been used as far back as the ancient Egyptians so these are not new ideas. I now use it to set my makeup and even made a video showing how easy it is to do it.

I keep it in my purse all Summer long for sunburns as it reduces the sting and on bug bites as it reduces the pain and swelling. Rosewater also promotes blood circulation and therefore hair growth when spritzed on the scalp. With antibacterial properties it is perfect to spray on small scratches to minimize scarring and infection. Rosewater can also reduce puffy eyes. For that I spray a cotton ball till it is good and wet then place in the freezer for 5 minutes. The cool cotton is place on my eyes and it feels divine. After a couple minutes my eyes are not as puffy.

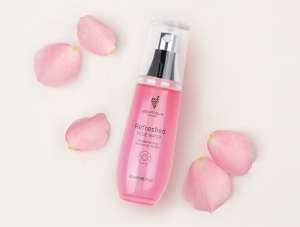
Can you just feel the love? While you can make your own rosewater at home with distilled water and fresh petals, it is only good for a week so you will need to make a batch every weekend. I opt instead for Refreshed from Younique. It slips easily in my purse during the Summer and I don’t have to make it. It has no alcohol but does have the required humectant.

So my Beauties, I hope I have answered some questions you may of had. If so, please share this blog on facebook. Have a fabulousness weekend!